Few comfort foods bring the same level of satisfaction as a perfectly cooked batch of buttermilk fried chicken tenders. With their crispy golden coating and tender, juicy interior, they are a favorite for family dinners, casual gatherings, or even a quick indulgent snack. These chicken tenders are simple to prepare at home, and when marinated in buttermilk, they achieve a delightful balance of flavor and texture that rivals restaurant-quality dishes.
What makes buttermilk fried chicken tenders so special is the way the buttermilk works as both a tenderizer and flavor enhancer. Combined with the right blend of spices, it creates a dish that is savory, slightly tangy, and deeply satisfying. Whether served with dipping sauces, paired with fresh sides, or enjoyed on their own, these tenders always deliver comfort and flavor.
In this article, we will explore everything you need to know about making buttermilk fried chicken tenders at home. From the science of marinating in buttermilk, to crafting the ideal breading mix, to perfecting the frying technique, you will gain step-by-step insights. We will also cover variations, serving suggestions, storage tips, and nutritional details so you can prepare these tenders with confidence.
The Secret Behind Buttermilk Marinade
Why Buttermilk Makes a Difference
The buttermilk marinade is the foundation of flavor and texture in fried chicken tenders. Buttermilk contains natural acids that gently break down the proteins in chicken, making the meat more tender without drying it out. At the same time, its creamy consistency helps spices cling to the surface of the chicken, ensuring every bite is flavorful.
Unlike plain milk or cream, buttermilk offers a mild tanginess that complements the seasoning blend. This tang balances the richness of fried chicken, making the dish less heavy and more enjoyable. Many cooks find that marinating chicken in buttermilk for several hours creates the perfect base for frying, leading to tenders that are juicy inside and crispy outside.
Essential Ingredients in the Marinade
To create the perfect marinade for chicken tenders, you need a few simple ingredients that are likely already in your kitchen. Start with fresh chicken tenderloins, which are naturally lean and quick to cook. Buttermilk provides the creamy base, while spices like salt, cayenne pepper, garlic powder, and paprika bring heat and depth of flavor.
Salt is especially important because it enhances the chicken’s natural taste and helps lock in moisture. Cayenne pepper adds a subtle kick without overwhelming the palate, while garlic powder provides a savory note. Paprika rounds out the seasoning with a smoky and slightly sweet touch. Together, these ingredients transform plain chicken into a flavorful dish worth savoring.
How Long to Marinate for Best Results
Timing plays a crucial role in marinating. For the most flavorful results, chicken tenders should be marinated for at least 4 hours. This gives the buttermilk enough time to work its tenderizing magic. For an even deeper infusion of flavor, marinating overnight is ideal.
One tip is to place the chicken and marinade in a sealable plastic bag and refrigerate it. This ensures that the buttermilk and seasonings coat the chicken evenly. Always place the bag inside a bowl or dish to avoid leaks in the refrigerator. When ready to cook, the chicken will already be infused with flavor and perfectly prepared for breading.
Why This Step Shouldn’t Be Skipped
Skipping the buttermilk marinade might seem like a time-saving idea, but it will drastically reduce the quality of your chicken tenders. Without the marinade, the chicken can turn out tougher, and the flavor will not penetrate the meat as deeply. The breading may also not adhere as well, leading to less crispy results.
The extra time spent marinating ensures that every bite delivers the right balance of tenderness, juiciness, and seasoning. It is the difference between chicken tenders that are simply fried and ones that are truly irresistible.
Print
Buttermilk Fried Chicken Tenders
- Total Time: 40 minutes, plus marinating time
- Yield: 4 servings
Description
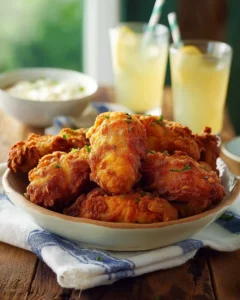
Crispy buttermilk fried chicken tenders that are juicy inside and golden brown outside. Perfect for family meals, parties, or casual dining.
Ingredients
For the Marinade:
2 pounds chicken tenderloins
1 cup buttermilk
1½ teaspoons salt
¼ teaspoon cayenne pepper
¼ teaspoon garlic powder
¼ teaspoon paprika
For the Breading:
1½ cups all purpose flour
1½ teaspoons baking powder
1 heaping teaspoon salt
¾ teaspoon black pepper
¾ teaspoon garlic powder
¾ teaspoon paprika
3 tablespoons buttermilk
For Cooking:
3–4 cups vegetable oil, for frying
Instructions
1. In a large sealable bag, combine the chicken tenderloins with buttermilk, salt, cayenne pepper, garlic powder, and paprika. Seal and massage to coat. Refrigerate for at least 4 hours or up to 24 hours.
2. In a bowl, whisk together the flour, baking powder, salt, black pepper, garlic powder, and paprika. Stir in buttermilk until clumps form.
3. Remove chicken from marinade, allowing excess to drip off. Coat each tender in the flour mixture, pressing firmly so the breading sticks. Place on a lined baking sheet.
4. Heat vegetable oil in a deep skillet or pot to 350°F (175°C). Fry chicken tenders in batches until golden brown and cooked through, about 6–8 minutes total, turning once.
5. Transfer fried tenders to a paper towel-lined rack. Serve hot with your favorite dipping sauces.
Notes
The chicken may appear lighter in the oil than it does once drained. Check color on a paper towel to avoid overcooking.
Cooked chicken tenders can be frozen for up to 3 months. Reheat at 350°F in the oven until crisp and hot.
- Prep Time: 15 minutes
- Cook Time: 25 minutes
- Category: Main Course
- Method: Frying
- Cuisine: American
The Perfect Breading for Crispy Chicken Tenders
Building Layers of Flavor with Breading
After marinating, the next crucial step in preparing buttermilk fried chicken tenders is coating them in a well-seasoned breading. This is where the magic of crunch and texture happens. The breading not only provides the signature crispy exterior but also locks in the juices, keeping the chicken moist during frying.
A successful breading mix should be balanced: not too heavy, not too light, and packed with flavor. It should cling to the chicken without falling apart in the oil, and it should create that satisfying crunch with every bite. The key lies in combining flour, baking powder, and a blend of spices with just enough buttermilk to form clumps that will adhere to the chicken surface.
Key Ingredients for the Breading
The base of the breading starts with all-purpose flour. Flour acts as the foundation that crisps up beautifully in hot oil. Adding baking powder may seem unusual, but it serves a special purpose. Baking powder helps the breading puff up slightly when fried, giving the coating an airy, crisp texture instead of a dense one.
Spices in the breading are just as important as the marinade. Salt and black pepper form the core of seasoning, while garlic powder and paprika add flavor complexity. Garlic powder enhances the savory aspect of the chicken, while paprika brings color and a hint of smokiness. A final touch of buttermilk stirred into the flour mixture creates small clumps, which adhere to the chicken and form crunchy ridges when fried. These ridges are what make restaurant-style fried chicken so addictive.
How to Properly Bread Chicken Tenders
Breading chicken tenders can get messy, but there are simple techniques to make it more efficient and effective. Begin by preparing a baking sheet lined with foil to hold the breaded chicken before frying. Remove a few marinated chicken pieces at a time, allowing excess buttermilk to drip off. Then, toss them in the breading mixture, pressing firmly to ensure the coating sticks well.
Using one hand for wet ingredients and the other for dry can help minimize the mess. This “wet hand, dry hand” technique keeps the breading process more controlled. Once the chicken is fully coated, place it on the baking sheet without stacking to avoid the breading coming off. Letting the chicken rest for a few minutes before frying allows the coating to set, which further improves crispiness.
Avoiding Common Breading Mistakes
Many home cooks struggle with breading that falls off during frying. This usually happens because the chicken was not pressed firmly into the flour mixture or because it was overcrowded during frying. Taking time to press the breading into the meat ensures better adhesion.
Another mistake is skipping the clumpy texture in the flour mixture. A smooth flour coating will not give the same crunchy ridges. By adding a touch of buttermilk to the flour, you create those irresistible little clumps that fry into golden nuggets of crunch on the chicken’s surface.
Why the Breading Matters So Much
The breading is not just about texture. It also locks in flavor and creates a protective layer that keeps the chicken juicy. Without it, the chicken would dry out quickly in hot oil. The breading also provides the perfect surface for dipping sauces to cling to, making every bite even more enjoyable.
This step, combined with the marinade, is what elevates buttermilk fried chicken tenders above ordinary fried chicken. When done correctly, you end up with tenders that are crispy, flavorful, and satisfying from the first bite to the last.
Mastering the Frying Technique for Golden Perfection
Choosing the Right Oil
The frying stage is where your chicken tenders transform into a crispy masterpiece. Choosing the right oil is one of the most important factors in achieving that golden, crunchy crust. Vegetable oil is the most common choice because it has a high smoke point and a neutral flavor, which allows the spices and buttermilk marinade to shine without interference. Canola oil or peanut oil are also excellent alternatives, offering stability at high heat and a clean taste.
Whichever oil you use, make sure it is fresh and not reused from previous frying sessions. Old oil can impart unpleasant flavors and darken the chicken too quickly. Fresh oil ensures an even golden-brown color and a clean, crisp finish.
Ideal Temperature for Frying
Temperature control makes the difference between soggy chicken and a perfectly crisp result. The oil should be heated to around 350°F (175°C). At this temperature, the breading crisps up quickly, while the chicken cooks evenly inside. If the oil is too hot, the outside will burn before the inside cooks through. If the oil is too cool, the breading will absorb excess oil, leaving the chicken greasy and heavy.
A simple way to test the oil without a thermometer is to drop a small cube of bread into the pot. If it sizzles immediately and begins to brown within a minute, the oil is ready. Maintaining this heat consistently throughout the cooking process is key.
Frying in Batches for Best Results
Overcrowding the pan is one of the most common mistakes when frying chicken tenders. Adding too many pieces at once lowers the oil temperature, causing the breading to lose its crispness. For the best results, fry in small batches. Place the tenders into the oil gently with tongs, making sure they have enough space to cook without sticking together.
Each piece should cook for a few minutes on one side until golden, then be flipped to finish on the other side. Depending on the size of the tenders, this usually takes about 6 to 8 minutes total. The chicken is ready when both sides are evenly browned and the internal temperature reaches 165°F (74°C).
Draining and Resting for Crispiness
Once the tenders are cooked, proper draining is essential to keeping them crisp. Transfer each piece to a paper towel-lined baking sheet to absorb excess oil. For even better results, place a wire rack over the baking sheet and set the chicken on top. This allows air to circulate around the tenders, keeping the bottom from getting soggy.
Letting the chicken rest for just a few minutes also allows the juices to redistribute inside the meat. The result is chicken that is moist inside and crunchy outside, just the way fried chicken should be.
The Golden-Brown Test
When frying, it can be difficult to judge doneness based on color alone. Chicken often looks lighter in the oil than it does once it has been removed. A tender that appears only lightly golden in the pot may actually be perfectly crisp once drained. If you are uncertain, remove a piece and let it sit briefly on paper towels to reveal its true color. This prevents overcooking while ensuring the ideal crispy finish.
Serving Suggestions and Flavor Variations
Classic Pairings That Never Fail
Buttermilk fried chicken tenders are incredibly versatile and pair beautifully with a wide range of sides. A timeless choice is crispy French fries or seasoned potato wedges, which mirror the crunchy texture of the tenders. Coleslaw offers a refreshing contrast, adding creaminess and crunch that balance the richness of fried chicken. For a lighter option, a fresh green salad with a tangy vinaigrette works wonderfully, cutting through the fried coating with acidity.
Dipping sauces are another essential element of the experience. From ranch dressing to tangy honey mustard, from smoky barbecue sauce to creamy garlic aioli, each option brings a unique personality to the meal. Even a simple ketchup can turn chicken tenders into a satisfying snack. The breading on buttermilk fried chicken tenders holds sauces well, so every bite is both crunchy and flavorful.
Creative Flavor Twists
One of the joys of homemade chicken tenders is the freedom to experiment with flavors. For a spicy variation, add extra cayenne pepper or chili powder to the marinade and breading. For a smoky Southern twist, use smoked paprika and a pinch of onion powder. If you prefer a lighter herb flavor, add dried oregano, thyme, or rosemary to the breading mixture.
International-inspired variations can also transform the dish. A sprinkle of curry powder in the breading introduces warm, aromatic notes. A touch of cumin or coriander creates an earthy depth. Pair these with complementary sauces such as yogurt-based dips or sweet chili sauce for a global take on fried chicken tenders.
Kid-Friendly and Crowd-Pleasing Options
For families with children, chicken tenders are already a hit, but they can be made even more appealing with simple tweaks. Shape the tenders into smaller, nugget-sized pieces for little hands, or serve them with mild sauces like honey mustard or a creamy cheese dip. For game-day gatherings or casual parties, serve them as finger food on a platter with a variety of sauces so guests can sample different flavor combinations.
If you want a healthier spin, try serving the tenders alongside roasted vegetables or a quinoa salad. The contrast of hearty fried chicken with lighter, nutrient-rich sides creates a balanced meal that still feels indulgent.
Presentation Matters
The way chicken tenders are served can elevate the experience from casual snack to restaurant-worthy meal. Present them stacked on a wooden board with small bowls of sauces arranged around the edges for a rustic, inviting look. For a family-style dinner, pair them with large bowls of fries and coleslaw in the center of the table so everyone can share.
Even the garnish can make a difference. Fresh herbs like parsley or chives sprinkled over the chicken add color and brightness. A squeeze of fresh lemon over the tenders just before serving enhances their flavor, balancing the richness of the fried coating with a refreshing citrus touch.
Why These Options Enhance the Dish
Serving suggestions and variations are not just about appearances. They allow you to customize the dish for different occasions, preferences, and dietary needs. From spicy to mild, indulgent to balanced, there is a way to enjoy buttermilk fried chicken tenders for every taste. This flexibility is part of what makes them a universally loved dish that never goes out of style.
Storage, Reheating, and Freezer-Friendly Tips
Storing Leftover Chicken Tenders
One of the best things about buttermilk fried chicken tenders is that they can be made ahead of time and stored for later. If you have leftovers, allow the tenders to cool completely before placing them in an airtight container. Store them in the refrigerator, where they will stay fresh for up to 3 days. Make sure not to cover them while still hot, as this traps steam and makes the breading soggy.
For short-term storage, placing the tenders on a plate lined with paper towels before refrigerating helps absorb any excess oil. This keeps the coating crispier for longer.
The Best Way to Reheat Fried Chicken Tenders
Reheating fried chicken can be tricky, as microwaves often make the breading soft and rubbery. The best method is to reheat in an oven. Preheat the oven to 350°F (175°C), place the tenders on a wire rack set over a baking sheet, and warm them for about 10 to 15 minutes until heated through. The wire rack allows hot air to circulate around the tenders, keeping the breading crisp on all sides.
For even quicker results, an air fryer is an excellent choice. Set it to 350°F and heat the tenders for 4 to 6 minutes. This method restores the crunchy texture while preventing the chicken from drying out.
Freezer-Friendly Instructions
If you want to prepare chicken tenders in advance, they can be frozen successfully. After frying, let them cool completely. Arrange them on a baking sheet in a single layer and freeze until firm. Then transfer the tenders to a freezer-safe bag or container. Stored this way, they can last for up to 3 months.
To reheat from frozen, place the tenders on a wire rack set over a baking sheet and bake in a 350°F oven for about 25 minutes, flipping halfway through. This method ensures the coating stays crisp while the inside heats evenly.
Tips for Maintaining Quality
The key to enjoying leftover or frozen chicken tenders is preventing moisture from softening the breading. Always use a rack when reheating to maintain air circulation. Avoid covering tenders tightly with foil during storage, as this traps steam and softens the coating.
If you plan on making tenders ahead for a party or gathering, consider frying them slightly underdone, then reheating them in the oven before serving. This ensures they remain golden, crispy, and freshly hot at the table.
Why These Methods Work
Proper storage and reheating methods are what make buttermilk fried chicken tenders not just a one-time meal but a versatile dish that can be enjoyed over days or weeks. By following these tips, you can preserve the crunchy texture and juicy interior that make this dish so satisfying. Whether you are enjoying fresh tenders or reheating leftovers, the experience can be just as delicious as the first bite.
Conclusion
Buttermilk fried chicken tenders are the perfect combination of simplicity, comfort, and flavor. From the first step of marinating in tangy buttermilk to the final crisp bite after frying, every stage of the process contributes to a dish that is satisfying and memorable. The buttermilk tenderizes the chicken and infuses it with flavor, while the seasoned breading ensures a golden crunch that locks in juiciness. Mastering the frying technique creates consistent results, while thoughtful serving ideas and flavor variations make the dish adaptable for any occasion.
These tenders are not only delicious when fresh but also easy to store and reheat without losing their signature crispiness. With a little planning, you can prepare larger batches and enjoy them throughout the week or freeze them for future meals. Their versatility means they can be served with classic sides, adventurous sauces, or even lighter accompaniments, making them suitable for both indulgent and balanced dining.
At their heart, buttermilk fried chicken tenders are more than just a meal. They are a reliable go-to recipe that brings comfort and satisfaction every time. Whether you are cooking for family, friends, or simply treating yourself, this recipe provides everything you need for success. Once you have tried them, you will find yourself returning to this method again and again, confident that each batch will deliver the same crispy, juicy perfection.